|
|
|
How to make a quill pen.
Step 1: (Finding a feather)
Locate a primary
feather (wing tip) from as large a bird as you are able. A goose
or turkey feather might be easy to find, and they will do just fine as
a quill pen; as they have done so for many centuries.
There are many
feathers to choose from online if you don't have a goose or turkey living
in your backyard, or a bird ranch nearby. The feathers should not
cost very much in either case. You can also find feathers at some
hobby shops.
If you are righthanded,
you will want a feather from the left wing. If you are lefthanded,
you will want a feather from the right wing. This can be determined
by the arch the quill takes in your hand, and will provide comfort by taking
advantage of that natural curve to the feather.
Step 2: (Removing the barbs)
Now that you
have your feather, cut back the plume, or barbs near the tip if you haven't
already done so. This way the pen will be more comfortable to use.
This is a matter of choice. If you like the plume, keep it.
You can always change your mind later.
Step 3: (Preparing the feather)
Quills are just
fine as they come from the bird, but they can be toughened up and improved
with various processes.
One way to improve
a quill, to make it last longer, and be more flexible in use, is to place
your quills up to the barbs in boiling water, and let them soak for a few
minutes.
Another way,
and a good second process if you have used the boiling water process, is
to fill a 14 ounce can (398 ml) with sand, heat it in your oven to about
325 degrees, and then stick the quills into the hot sand up to the plume
and barbs. Leave them until the sand returns to room temperature.
With this done,
the quills are now strong and pliable enough to carve without splitting
or shattering. They will also write more lines before needing the
help of a nibmeister*.
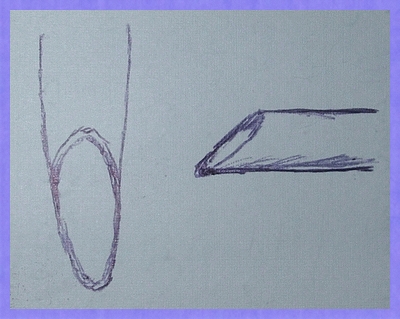
Step 3: (Cutting the tip)
Now cut the
tip of the quill off. Cut it at a 45 degree angle away from you.
You need to place the quill tip firmly on a cutting board with the top
of the pen up and away from the cutting board.
Pendemonium.com
A great location to find all things pen, as well
as up coming events. |
|
|
Website I endorse:
PleasureUnwoven.com
Help and education regarding substance addiction.
Pendemonium.com
A great location to find all things pen, as well
as up coming events.
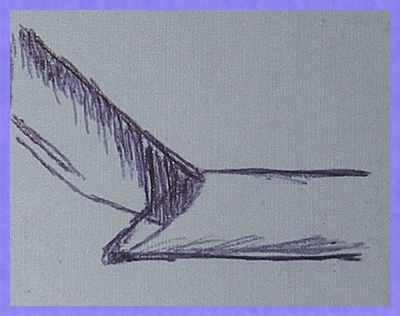
Step 4: (Cutting the slit)
Now place an
Exacto knife, or pen knife under the upperside of the quill and lever up
just a smidgin to create the slit that will draw the ink to the tip of
the nib. Remember: 'just a smidgin'. You can always lengthen
it if you feel the need, and, keep in mind, it is easy to split the quill
too much if you press your luck.
Step 5: (Preparing the feather)
Now you cut
away half the bottom side of the quill; cutting perpendicular to the shank
of the quill. You need to leave enough of the quill to form the shoulders
of the nib. This is also a good time to clean the quill out of any
goo that might be inside it.
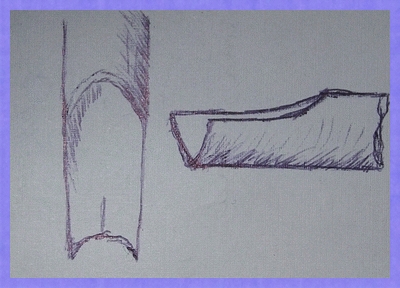
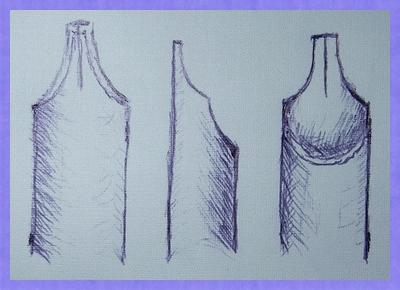
Step 6: (Carving the nib)
Shaping the
shoulders of the nib can be done with a pen knife, Exacto knife, or a pair
of very small curved scissors. Copy the shape below as best you can,
and remember to include the bevel on the topside of the nib.
You will find
your favorite shape as you make more pens.
Enjoy!!
* Nibmeisters are master repairers and servicers of fountain pens,
nib pens, and quills; anything that uses a nib, and is mechanical; writers
not included. |
|
|